• Recipes
  • Lifestyle
  • Fitness
  • Nutrition
  • |
  • About
  • Work With Me
    • Brand partnerships
    • Nutrition Coaching
September 9, 2011

How to Take Better Pictures: What is Aperture?

16 comments
share this post:
  • Pinterest
  • Facebook
  • Twitter
  • Email
Hello friends!
Matt and I are currently on our way to a wedding in Poughkeepsie, New York, so in the meantime, please enjoy the latest photography tips guest post from my friend Ben! This month’s topic is aperture. If you missed the first three posts in this series, check those out first:
  • How to Take Better Food Pictures: Ditch the Flash
  • How to Take Better Food Pictures: Stabilize Your Shot
  • How to Take Better Food Pictures: ISO
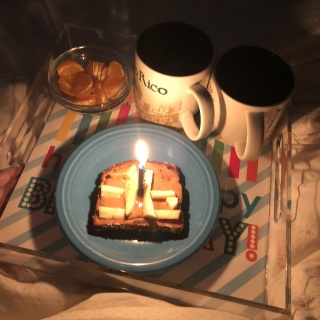
Enjoy!

–

How to Take Better Pictures

Part 4: What is Aperture?

by: Ben Powell

–

As I progress in my photography, more and more friends have come to me seeking photography advice. I’ve already written a post advising people why they should get a DSLR, but I guess I’ve kinda left them hanging a bit once they’ve gone off and purchased those DSLRs. So, even though this breaks the progression of the “food photography tips” I had been planning, due to popular demand I will try my best to explain this whole aperture business.

The first thing you need to understand is that getting good photographs is all about learning to control the light that comes into the camera.

There are THREE things that impact how much light gets into your camera:

       1) ISO

       2) Aperture (f/stop)

       3) Shutter Speed


Shutter Speed, Aperture, and ISO as displayed on a Rebel t2i
 
ISO and aperture are a little more abstract and tricky to understand than shutter speed. I already wrote a guest post detailing ISO, so check that post out first! And now for aperture. Aperture is how big the opening is in the lens. This opening gets bigger or smaller depending on how much light you want to let through. The bigger the opening, the more light that gets in, and the brighter your photo. This opening is designated by the f/stop. You see the letter “F” and a “/” and then a number. That number is the size of the opening, but in a counter intuitive way. The bigger the number, the SMALLER the opening. I say again:

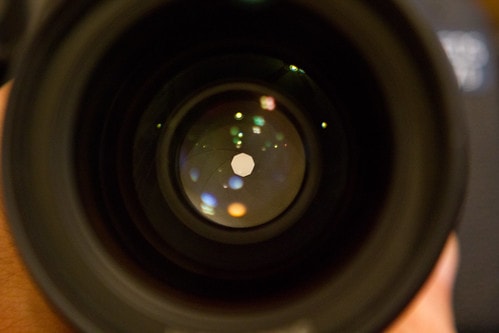
BIG f/stop number = SMALL opening = Less Light

SMALL f/stop number = BIG opening = More Light


Wide Aperture vs. Small Aperture
 
Get it? Got it? Good. But you see, it doesn’t stop there, because you might be thinking: “Well, the more light that gets in, the better lit the picture will be in the end.” And in general you’re right, because more light means it’s easier to get a well exposed photo. But the aperture does this interesting thing based on the physics of the lens called depth of field. This depth of field effect is what typically differentiates “pro” looking photos from the photos you take with your cell phone. So here’s another way of thinking about the aperture:

BIG f/stop number = MORE depth of field = Everything in focus

SMALL f/stop number = LESS depth of field = Only certain things are in focus

Confused yet? Let’s take a look at some examples. Check out these photos I took of the 5th Harry Potter book (just finished it!). On the far left (small f/stop number), I’m focused near the bottom of the page, and you can see how only certain lines are in focus. But as I increase the f/stop (number goes UP), more and more gets in focus.


Click on the image for a better look
Let’s look at a people-example, too. In these portraits I quickly shot, you can see how Taylor is nicely in focus and the background fence is a pleasing blob in the background. But as I increase the f/stop, the fence gets more and more in focus, until finally you see how ugly it actually is.


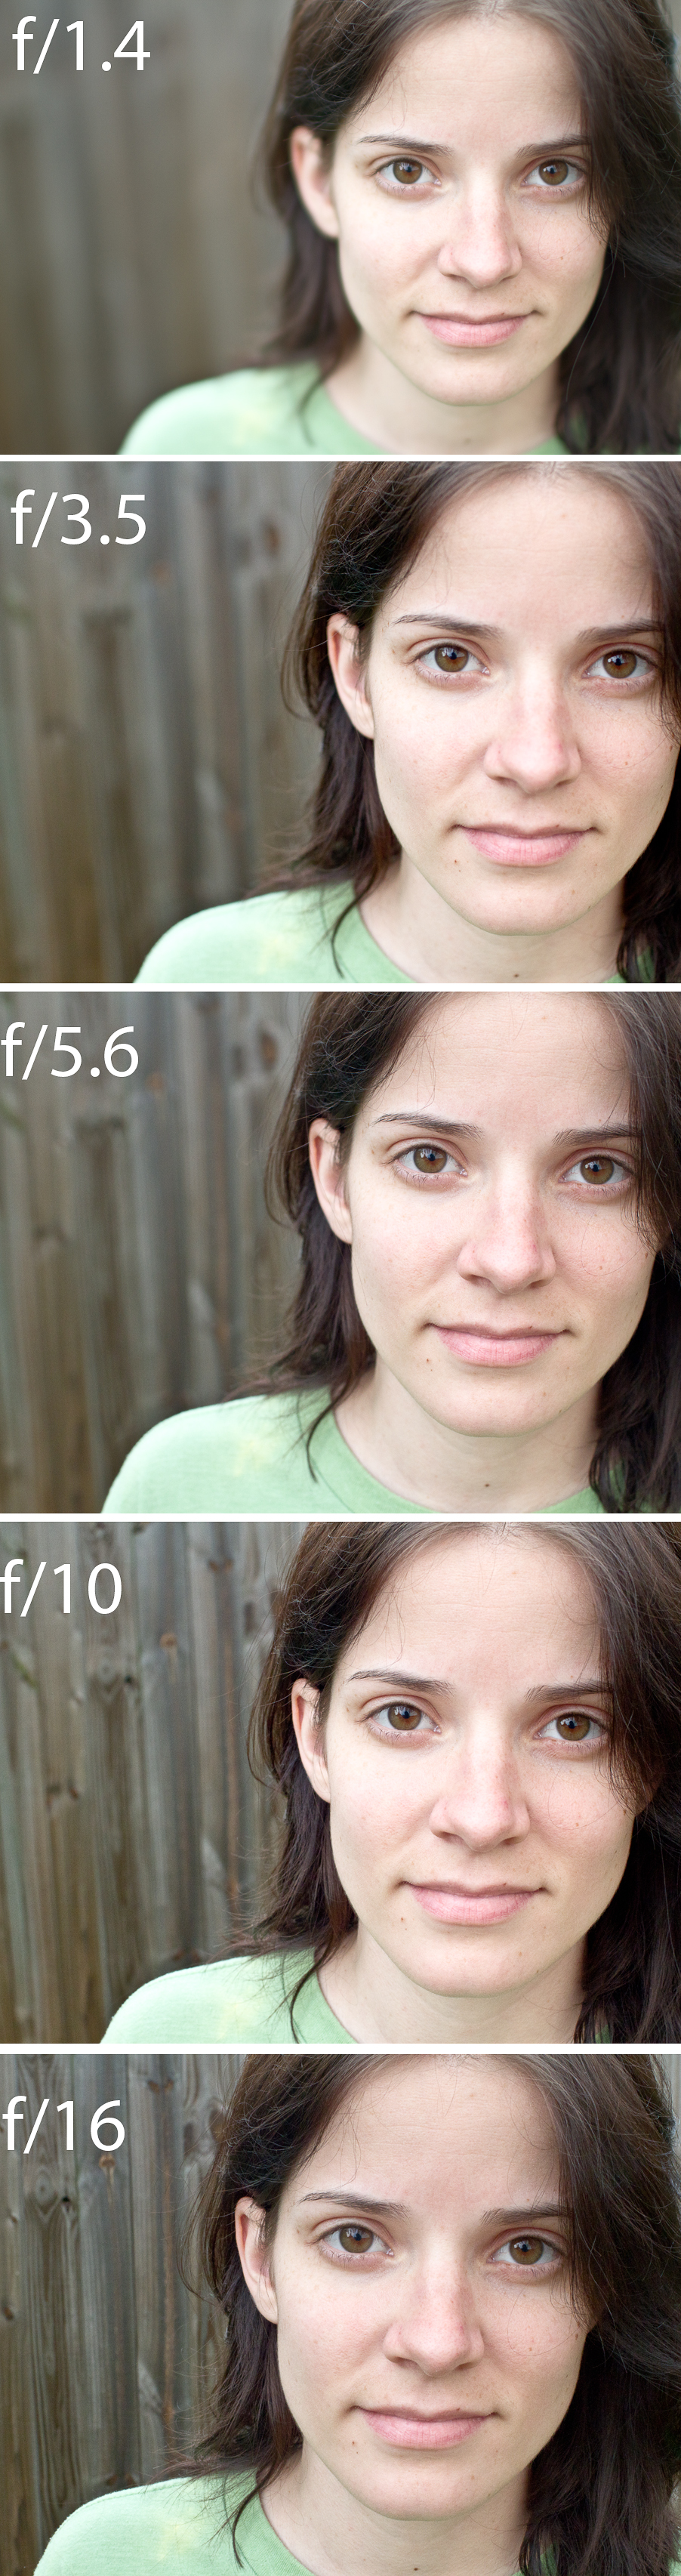
In general, the blurrier the background, the more “artsy” and “pro” your pictures will look. Therefore, to get the strongest effect, you want to shoot with the aperture wide open, or that is to say, with a SMALL f/stop number. It’s not always that simple though. You may run into certain complications in certain shooting situations where you NEED more to be in focus. For example, when you’re taking a picture of your food on a plate, do you really want ONLY those veggies at the front of the plate to be in focus? Maybe you want to have the whole plate in focus! In reference to my Harry Potter shot, do I want to highlight a specific line? Or do I want to just have a clean shot of the entire page? Figuring out what you want the shot to look like in the end is key to mastering aperture.

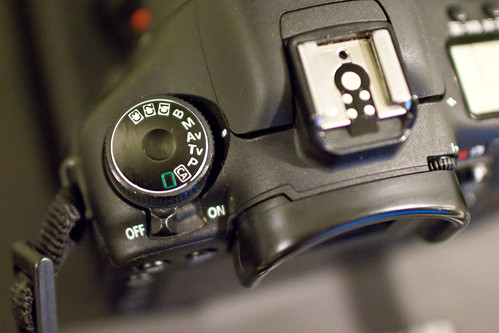
So, how do you change the aperture (f/stop) setting? A good place to start with messing with your aperture is with the AV setting on your camera. This setting will have your camera automatically set everything else EXCEPT for the aperture.


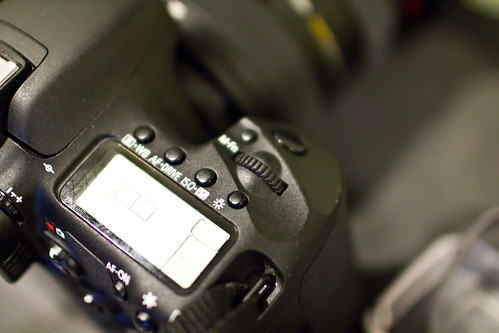
You can then use the dial (next to M-Fn) to change the aperture value
 
Getting a good exposure is being able to carefully balance all three of the things I highlighted at the beginning of the post: aperture, shutter speed, and ISO. But when you’re just learning, better to eliminate the clutter and focus on just one thing. AV mode will let you do that so you can experiment. Keep in mind, if it’s a dimly lit room, you may still need to stabilize your shot in order to make sure there is no motion blur. (Tip #2!) Different lenses have different maximum apertures (how small the number can get). The heavier, bigger, more expensive lenses (and of course macro lenses, which are made to do this) can get REALLY wide (as wide as f/1.2 — meaning tiny depth of field/only a small amount in focus) but others can only get as wide as f/4 or thereabouts. You should still be able to experiment with it, but here is my recommendation for a lens to REALLY take advantage of aperture and learn how to use it: Canon 50mm f/1.8 or Nikon 50mm f/1.8. My sister Gretchen uses this lens almost exclusively, and she gets some very nice photos over on her blog.

Good luck! Please leave some links to pictures you’re taking, and whether or not you want any critique!

—-

Ben is a freelance photographer and musician in the DC Metro area.

Learn more about him here: http://www.about.me/benpowell

Check out his photography business here: http://photography.benpowellmedia.com

And follow his project365 here: http://www.starvingartistry.net

- anne
share this post:
  • Pinterest
  • Facebook
  • Twitter
  • Email

join the list

Sign up for my e-newsletter and I'll send you a meal plan packed with a week's worth of healthy meals, snacks and a shopping list. Happy eating!

you might also like:

family bike ride

Wind in our Hair

healthy on the go snack recipes

10 Healthy On-the-Go Snack Recipes

Recent Quick and Easy Dinners + Meal Planning Board

Weekend Adventures + Maryland Eastern Shore Wedding

leave a comment

Cancel reply

16 comments
  • Sana
    September 9, 2011 · 11:28AM:
    I would love some picture feed back! I have the same lens as Gretchen, http://www.supersana.com/2011/09/06/ugh-rain/ How can I take better close up pictures? Like of the chicken? Thanks!
    Reply
  • Gina @ Running to the Kitchen
    September 9, 2011 · 11:31AM:
    Poughkeepsie!? You're like 15 minutes from me! Have fun at the wedding. I can probably guess where it's being held, hope the weather gets better, it's gross and cloudy here right now.
    Reply
  • Kelly
    September 9, 2011 · 11:46AM:
    Shooting in manual mode really does make such a difference. Thanks for the refresher. And to Sana, lighting & composition make a huge difference.
    Reply
  • J3nn (Jenn's Menu and Lifestyle Blog)
    September 9, 2011 · 11:59AM:
    I live near Poughkeepsie! In fact, I might be there today. Enjoy the Hudson Valley.
    Reply
  • Lindsey
    September 9, 2011 · 5:13PM:
    I love these posts, so helpful, thanks!!
    Reply
  • Katy Widrick
    September 11, 2011 · 10:41PM:
    I already put these tips into action for a couple of fun shooting opportunities this week. It's still hit or miss for me, but saying "big f stop, less light" really helped. :) Now I'm dying to understand shutter speed and how it fits in with the rest!
    Reply
    • Ben @ StarvingArtistry
      September 11, 2011 · 10:47PM:
      Glad you're on the right path, Katy! Practice makes perfect! We'll definitely talk about shutter speed soon!
      Reply
  • Sarah September 18, 2011 · 9:00PM:
    Hi, I have a Nikon D3100 and I am having trouble getting the blurred look in the background. i have changed the setting to just "A" and adjusted the numbers and each time the pictures still look the same. Do I only see the blurred image when I upload the pictures to my computer or should I be seeing it on my playback? I am just playing around with my camera and am new to this. Any help is appreciated, thank you!
    Reply
    • Ben @ StarvingArtistry
      September 18, 2011 · 10:00PM:
      @Sarah -- There are a few things that might be happening. Be sure to: A) make sure the apertures is as wide (small number) as it can possibly be B) wide angles (zoomed out) diminish the blurry background effect, so try zooming in farther C) add more separation between your subject and the background. The farther away the background is, the blurrier it will appear.
      Reply
  • Jen @ Light Enough to Travel
    September 21, 2011 · 2:45PM:
    Is it possible to get a permanent link to this series of posts in your "favourite posts" section from your navbar? I keep coming back to it but I have to search for it when I do. :)
    Reply
    • Anne P
      September 21, 2011 · 6:58PM:
      Yes, great idea! Thanks!
      Reply
    • Anne P
      September 26, 2011 · 6:25PM:
      Okay they are all linked under my "Health Tips & Favorite Posts" tab!
      Reply
  • Carey
    March 6, 2012 · 4:56AM:
    Thanks for this post. I have started a food blog (secrettkitchen.wordpress.com), and although some of my day time pics aren't too bad, most of the ones I have taken in low light are awful. Most of the meals I have made are being served in the evening, so it is inevitable that low light photography will be required. I have a good camera, but I don't really know how to use it (all the gear and no idea!), so I am going to try some of the tips you suggested and try to get some better pics. Thanks for sharing!
    Reply
    • Anne P
      March 6, 2012 · 8:29AM:
      Good luck - hope the tips help!
      Reply
  • Siddharth Malkania
    October 29, 2017 · 11:46AM:
    In the start, the info was little confusing. But, in the middle of the write up, you could explain it well. An informative and detailed write up indeed. Actually, Aperture works as a pupil of the human eye. The pupil determines the value, how much light it should allow into the retina. Value of aperture in photography holds the same importance. Aperture is embedded in the camera lens. Aperture is made up by several blades stacking together. It opens diagonally to let the light in. I also wrote a blog based on the value of aperture in photography. Please go through it and leave your feedback. I would appreciate it. http://siddharthmalkania.com/how-shutter-in-dslr-camera-works/ Regards, 
Siddharth Malkania
    Reply
- next post
previous post -

about Anne

anne mauney fannetastic food
Hi, I’m Anne! I'm a Washington D.C. based Registered Dietitian, mother, runner, and lover of travel, adventure, and the great outdoors. I've been blogging since 2009, sharing a mix of lifestyle content, recipes, and fitness tips. Come for the recipes – stay for the fun!
Learn more

fannetastic reads

Top Posts
01

My Top 9 Most Popular Recipes + Posts

02

Why I Don’t Recommend Whole30

03

What Causes Sugar Cravings (+ How to Stop Them!)

04

How I Make Money As a Blogger

05

Blog Recipes We Make Again and Again

06

What to Eat Before and After a Long Run

07

What to Eat During Long Runs

08

7 Common Nutrition Myths

09

How to Love Veggies

connect with Anne

Email me
anne mauney

I’m Anne, a Registered Dietitian and mother. I've been blogging since 2009 and love showing others that eating nutritious foods and staying active can actually be fun rather than overwhelming!

When I’m not writing or cooking for fannetastic food, you can find me running, coaching nutrition clients, or on an adventure with my family. Feel free to reach out - I'd love to hear from you!

follow anne:

join the list

Sign up for my e-newsletter and I'll send you a meal plan packed with a week's worth of healthy meals, snacks and a shopping list. Happy eating!

back to top
  • About
  • Contact
  • Recent Posts
  • Privacy Policy
  • FAQ

© copyright fannetastic food - site by kc - exclusive member of mediavine